> For the complete documentation index, see [llms.txt](https://hello.kodadot.xyz/llms.txt). Markdown versions of documentation pages are available by appending `.md` to page URLs; this page is available as [Markdown](https://hello.kodadot.xyz/tutorial/teleport/auto-teleport.md).
# Auto Teleport
This unique tool allows you to automatically bridge the required funds from your wallet, eliminating the hassle of manually transferring funds every time you're short. With just one extra transaction signature, you're good to go!
## Why is it necessary?
Not all NFTs are on the same chain. KodaDot supports more chains, so you have the option to buy or mint your art in different places. At the moment we have:
* Polkadot Asset Hub NFTs: bridge DOT → Asset Hub Polkadot
* Kusama Asset Hub NFTs: bridge KSM → Asset Hub Kusama
* Kusama NFTs (RMRK standards): where you can use the KSM you have normally on Kusama Network
You are still using the same DOT and KSM you have; you are just bridging it between different chains.
That's why we created Auto-Teleport. This feature will allow you to **buy, list, and create NFTs** without the need to teleport your tokens manually. It will automatically bridge the amount of tokens you need from most asset-rich chains.
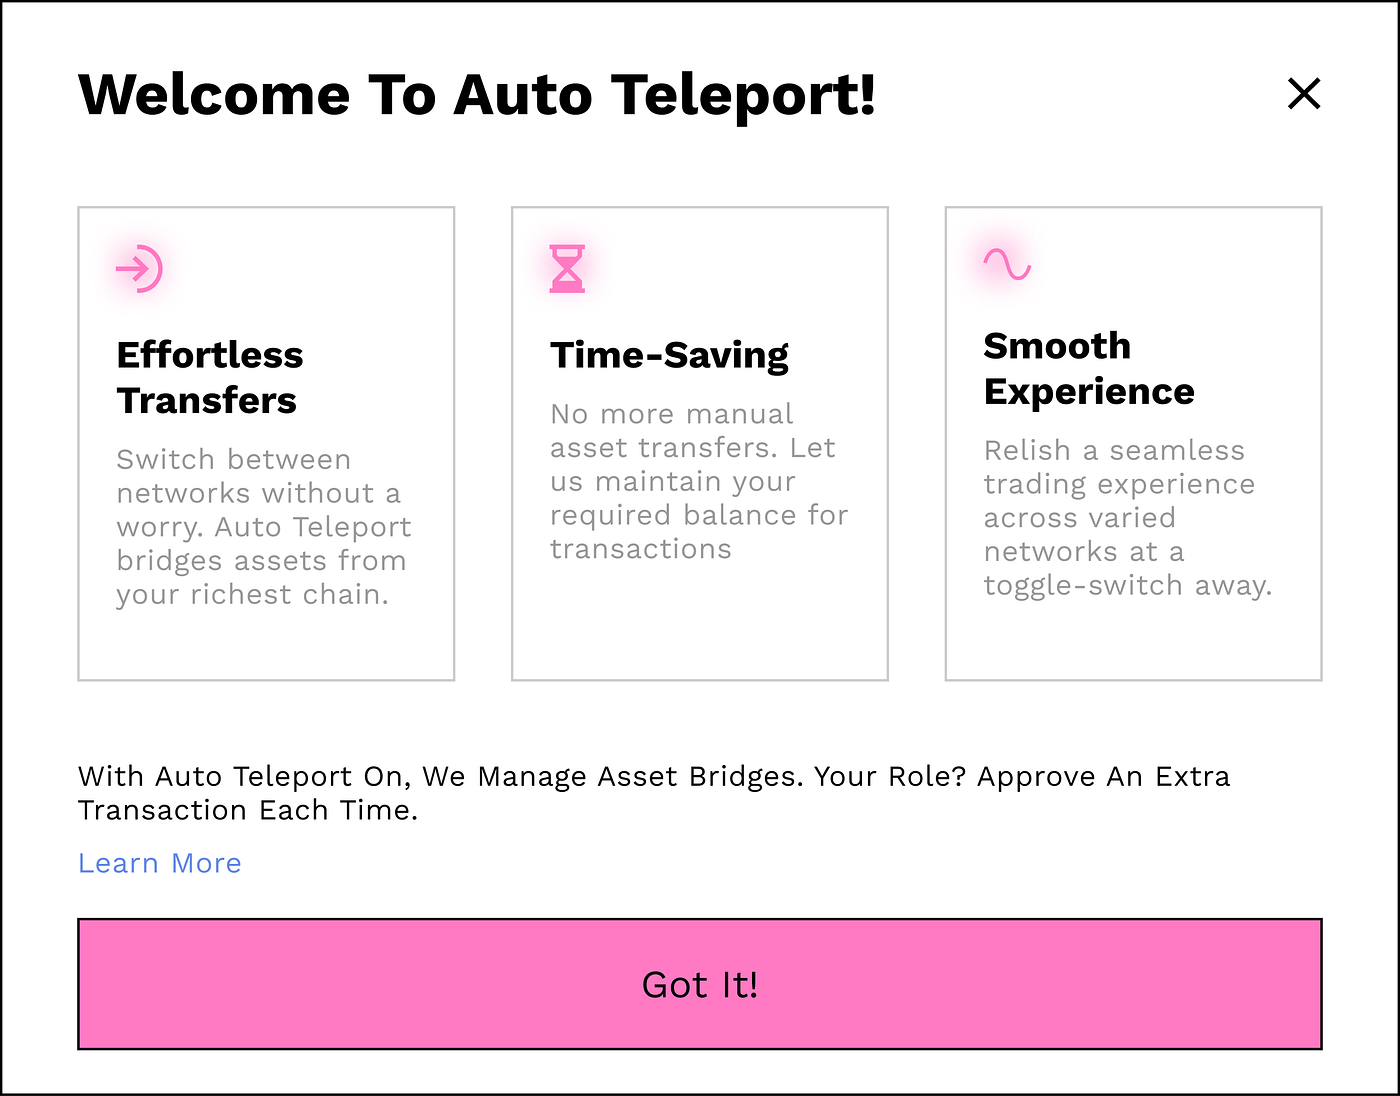
* **Effortless transfers**: Switching between networks without a worry. Auto-teleport bridges assets from your richest chain.
* **Time-saving**: No more manual asset transfers. Let us do the job.
* **Smooth experience**: relish a seamless trading experience across varied networks at a toggle switch away.
**Example:**
*Let's say that you have in your wallet some DOT tokens, and you want to buy an NFT on Asset Hub Polkadot (AHP). All NFTs on AHP have their price in DOTs, but in order to buy an NFT, you need to bridge your DOTs first. Auto Teleport feature will allow you to buy an NFT without doing extra steps. You will only get a popup showing you the best teleport option, which you can confirm. You will be asked to sign one extra transaction, and the NFt will be yours.*
It works both ways. Your only concern is to have DOT or KSM tokens in your wallet in order to start your shopping, nothing more.
## How it works?
First-time users will see this screen popup with some general information about the feature:
## Where can I use Auto Teleport?
Auto Teleport should activate itself once you have enough funds on other chains. It will appear during:
* Creation process: Create collection/NFT
* Buying NFTs
* Listing NFTs
## Tutorial Example
This short tutorial will help you understand the Auto-Teleport feature in simple terms, making your NFT buying experience smooth and easy! Let's try buying NFT with this feature.
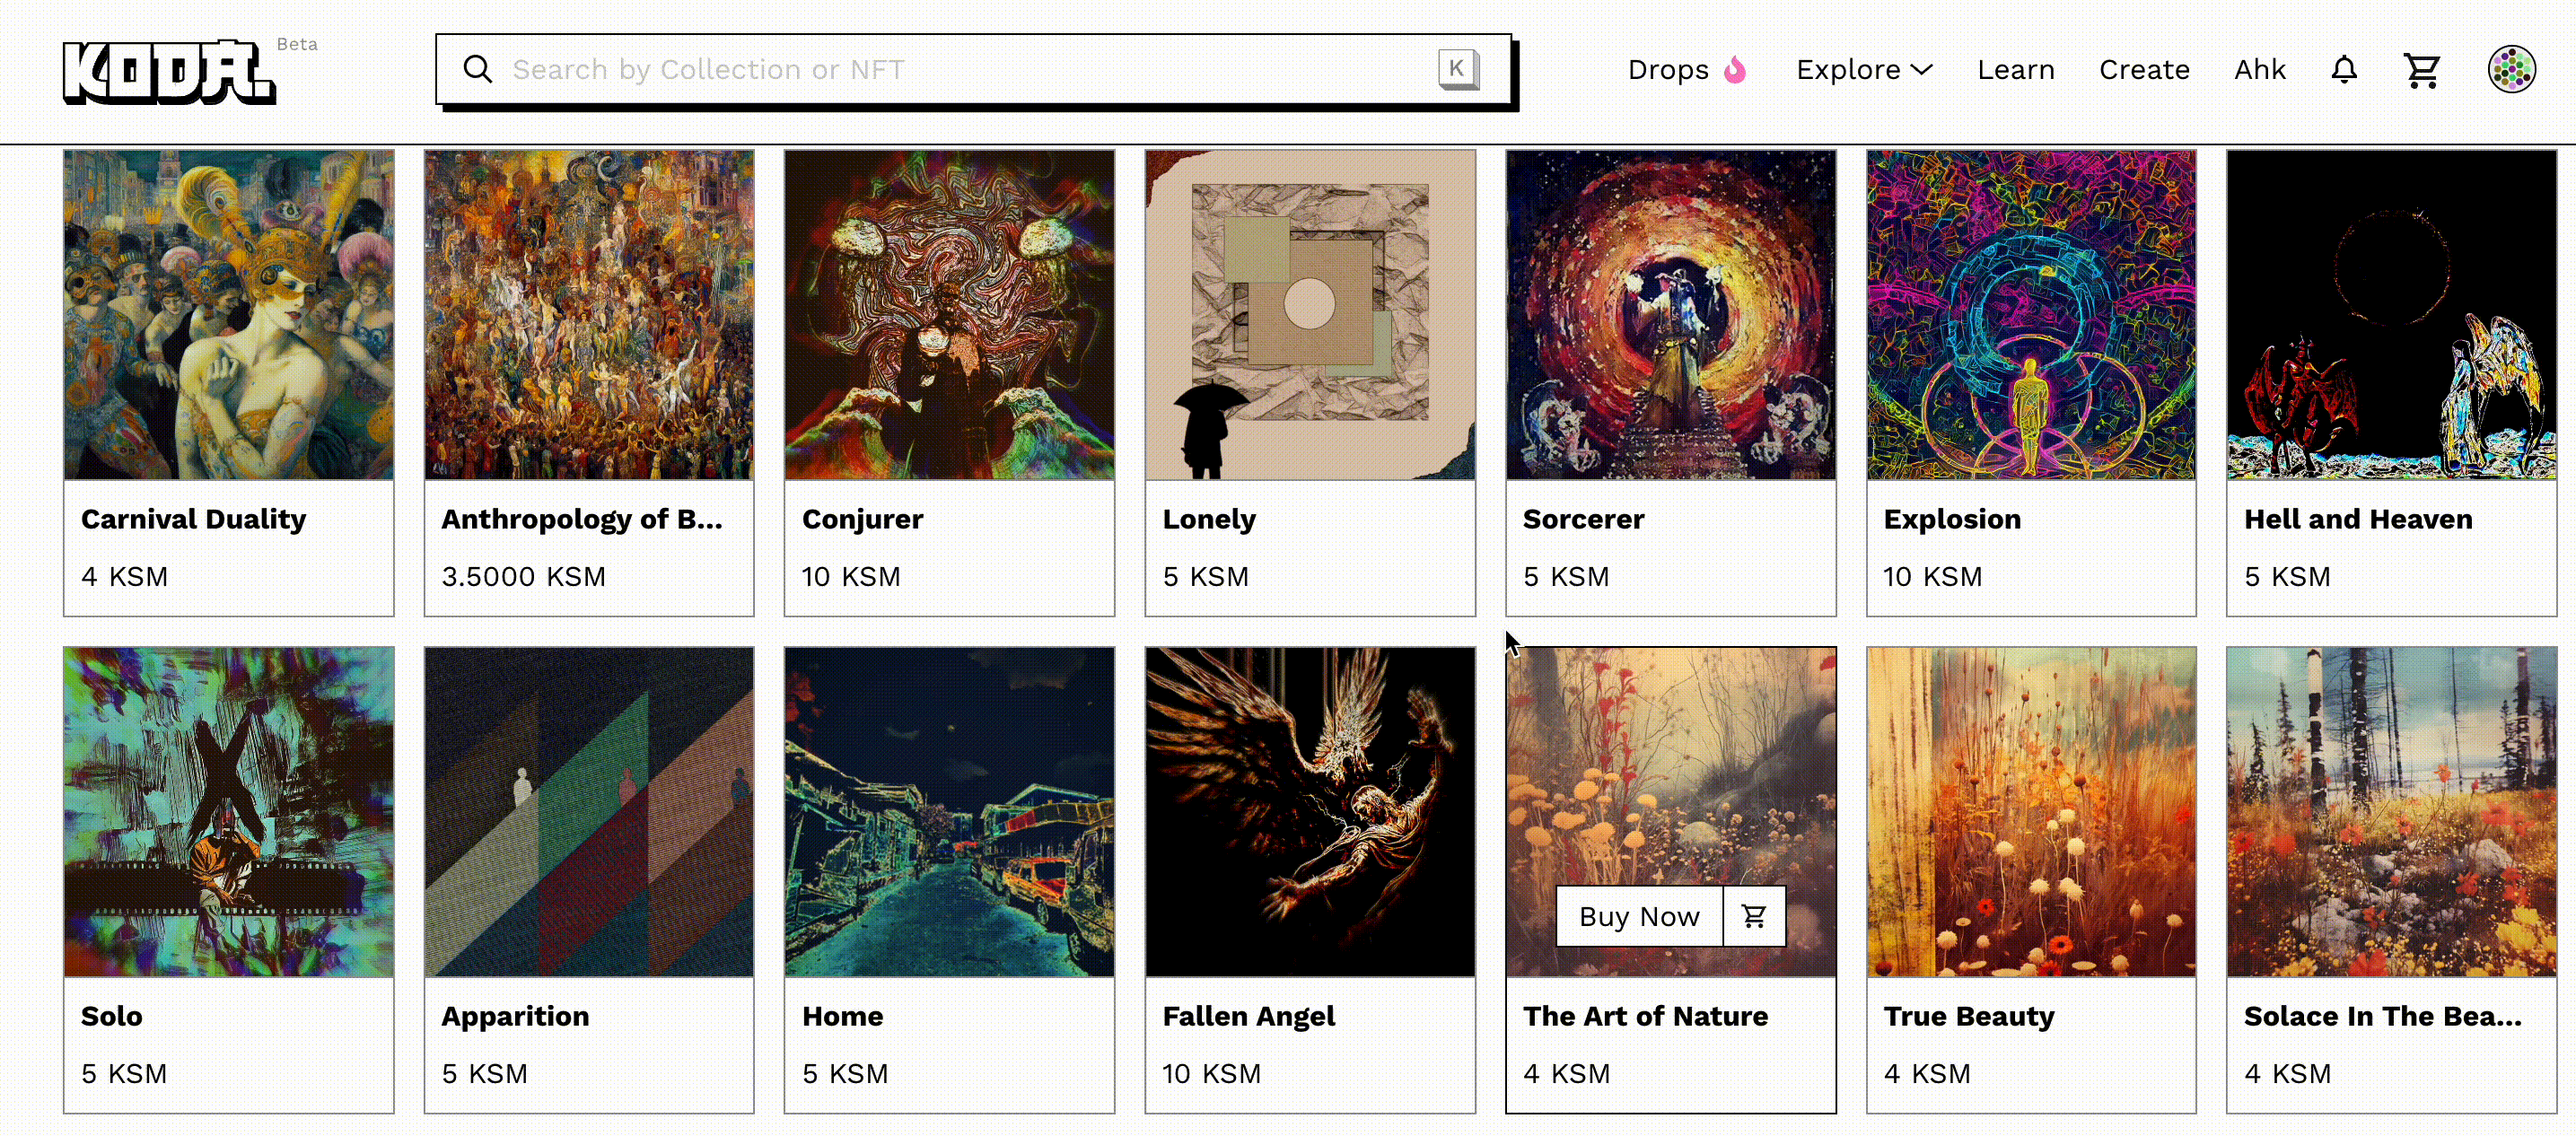
### **Step 1: Choose Your Favorite NFT**
First, browse through the marketplace and find an NFT that you like and want to buy.
*Note: You can use this feature even with the **cart function**! Add any number of NFTs to your cart and then buy them as a batch with the help of Auto Teleport.*
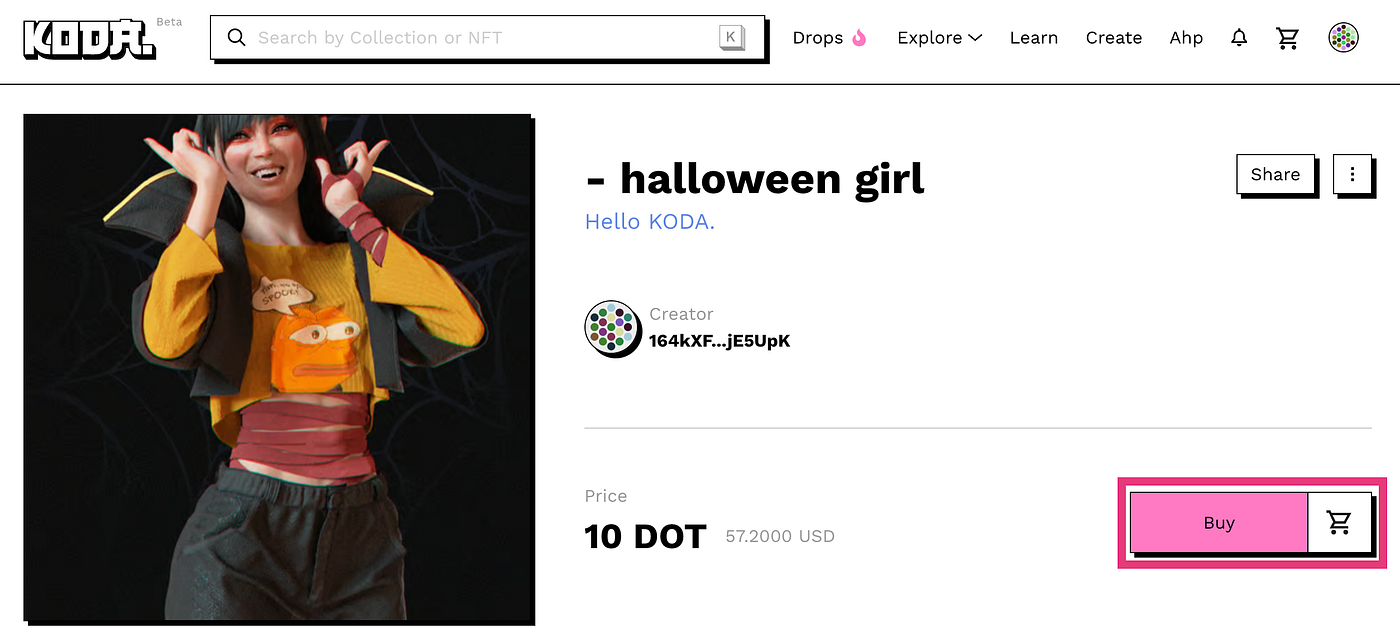
### **Step 2: Click on Buy**
Click the "Buy" button or add to your cart. The system will check if you have enough money in your wallet to buy the NFT. You can purchase or add the NFTs to your card directly from the Explorer:
Or you can open a specific NFT and do it from there:
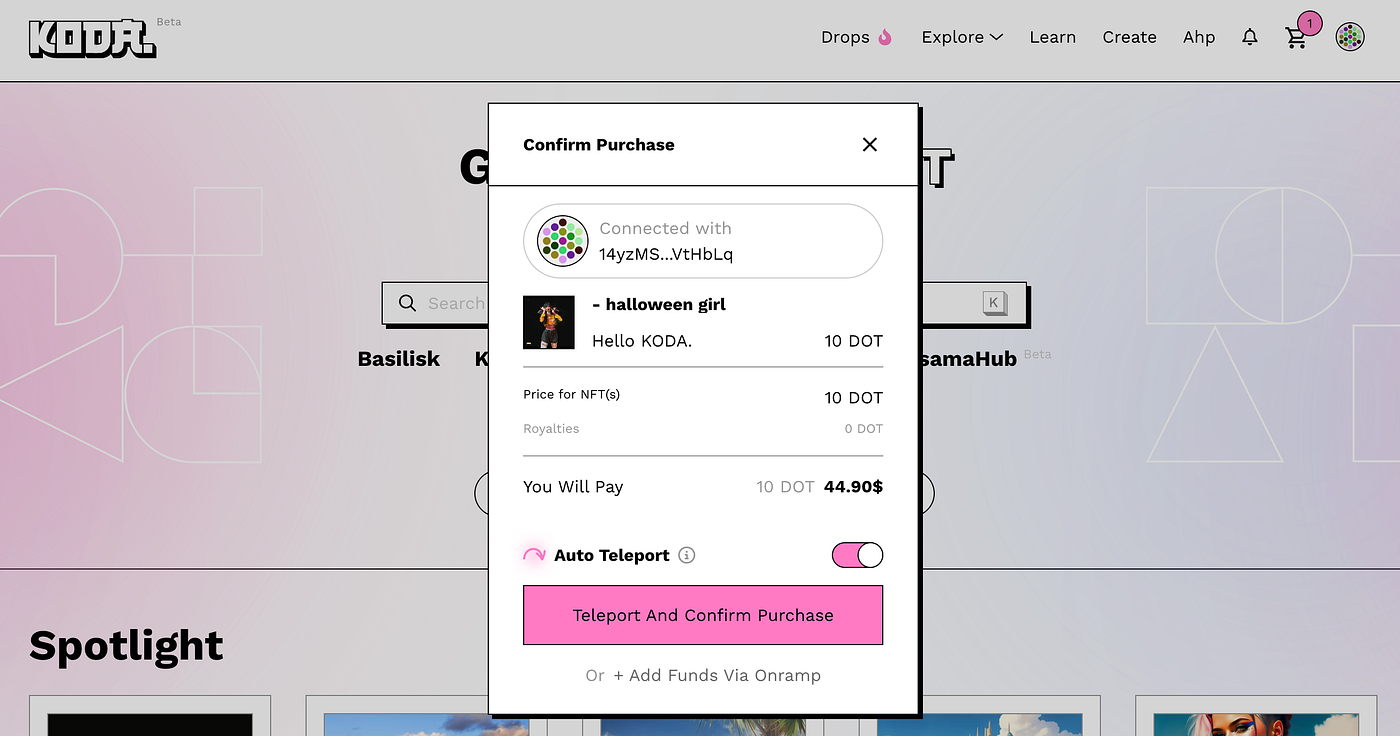
### **Step 3: Auto-Teleport Option**
If there's not enough money in your account, don't worry! The "Auto-Teleport" option will appear. This feature will help you bring the money you need to your account.
For more info, click on the small i.
### **Step 4: Click on Auto-Teleport**
Click on the "Teleport and Confirm Purchase" button. The system will guide you on how to move the needed money to your account. This option will be clickable only if you have enough funds on the other chain.
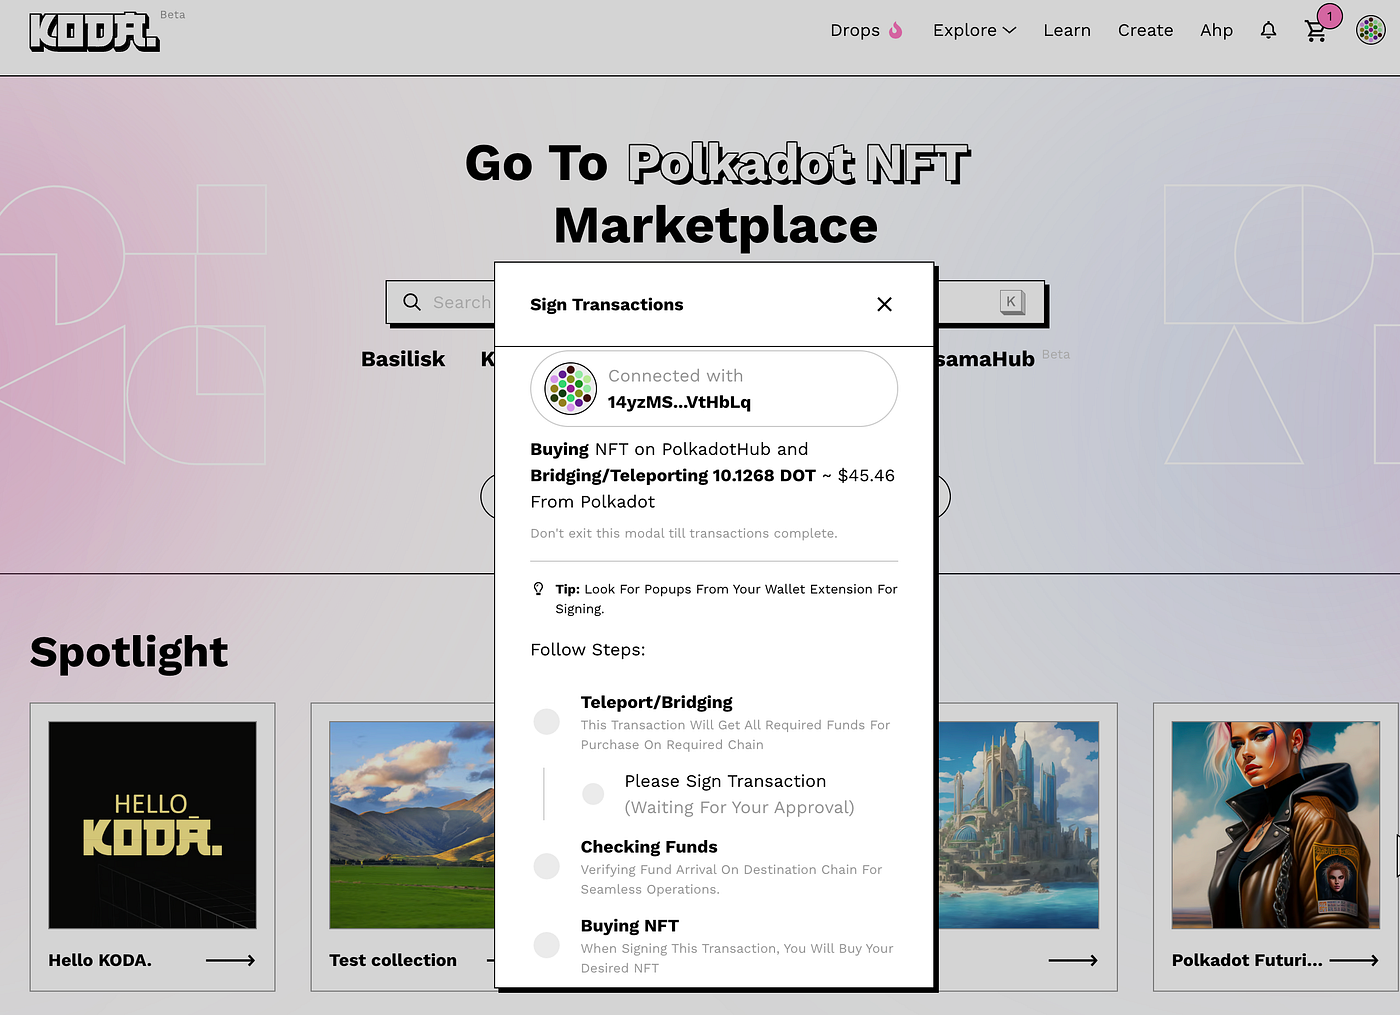
### **Step 5: Sign Transactions**
You will see a message asking you to approve the transaction. This means you need to give permission to bridge your tokens. The whole process will be visible on your screen. In total, you will need to sign two transactions.
### **Step 6: Enjoy your NFT**
After signing two transactions and a short wait, it's done!
### **Congratulations!**
You've learned how to use the "Auto-Teleport" feature. Now, you can buy NFTs more easily. Enjoy your shopping!
---
# Agent Instructions
This documentation is published with GitBook. GitBook is the documentation platform designed so that both humans and AI agents can read, navigate, and reason over technical content effectively. Learn more at gitbook.com.
## Querying This Documentation
If you need additional information that is not directly available in this page, you can query the documentation dynamically by asking a question.
Perform an HTTP GET request on the current page URL with the `ask` query parameter, and the optional `goal` query parameter:
```
GET https://hello.kodadot.xyz/tutorial/teleport/auto-teleport.md?ask=&goal=
```
`ask` is the immediate question: it should be specific, self-contained, and written in natural language.
`goal` is optional and describes the broader end goal you are ultimately trying to accomplish on behalf of the user. GitBook uses it to tailor the answer towards what is most useful for that goal.
The response will contain a direct answer to the question and relevant excerpts and sources from the documentation.
Use this mechanism when the answer is not explicitly present in the current page, you need clarification or additional context, or you want to retrieve related documentation sections.